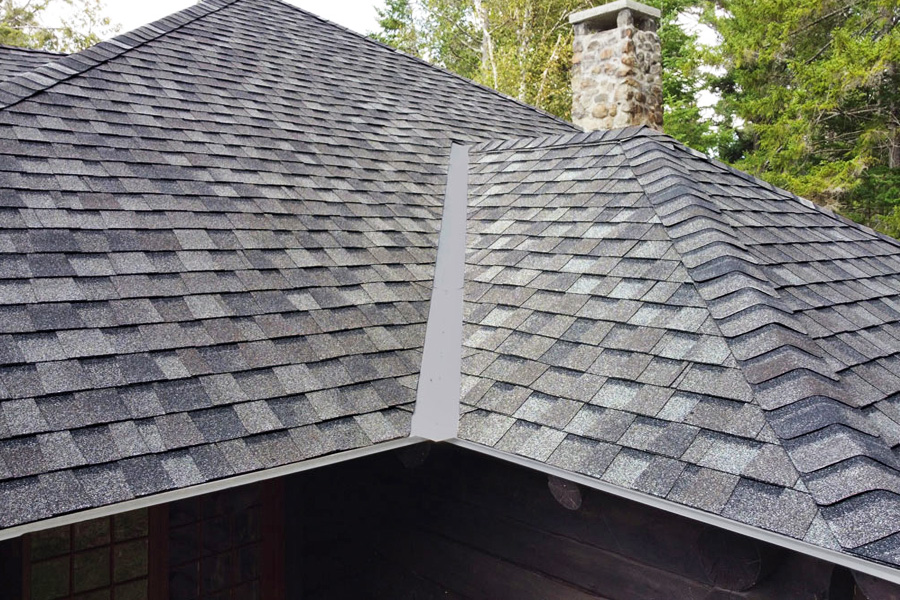
If you’re a homeowner with a shingle roof, you know that it requires maintenance to keep it looking its best and functioning properly. One important aspect of roof maintenance is regular cleaning. But knowing how to clean roof shingles properly without damaging the shingles or causing leaks can take some skill.
For this post, we asked our roofing contractors to put together the necessary steps to clean a shingle roof safely and effectively. From taking safety precautions before starting to spraying cleaner and scrubbing shingles, we’ve got you covered.
We’ll also give you tips on preventing algae and moss growth and what to look for when it comes to time for a roof replacement so that your roof stays clean for longer.
Step 1: Pick The Day
When it comes to cleaning the shingles on your roof (or anything up on your roof), it’s important to choose the right day for the task. Cleaning your roof on a cloudy day is ideal because the cleaner will have more time to work before evaporating. Plus, working outdoors is much easier and more comfortable on days that are less hot and humid.
It’s also crucial to avoid cleaning your roof on days when the temperature could drop below freezing, as this can cause the cleaning agent to freeze and potentially damage the shingles.
Step 2: Stay Safe
Now that you have chosen the day, let’s talk about safety and precautions.
Before you begin the cleaning process, make sure you have the necessary safety equipment, including goggles, gloves, and a mask. Additionally, use a stable ladder and have someone nearby to assist you if needed.
It’s important to avoid working on the roof during wet or windy conditions to prevent accidents. Clear the area around your house to minimize the risk of any damage from falling debris. By following these safety measures, you can effectively clean your shingle roof without putting yourself or your property at risk. Stay safe and enjoy a clean and well-maintained roof.
Step 3: Prepare The Area
Before you begin your cleaning project, it is crucial to take steps to protect vehicles, furniture, and the nearby plant life. One way to do this is to move everything into your garage, further away from the house, or by placing drop cloths over items that might be sprayed indirectly as a result of your cleaning.
This simple precaution can help shield from the potentially harmful chemicals that will be applied to the roof. This will ensure that your cleaning efforts do not cause any unintended damage to the surrounding area.
Step 4: Remove Debris
Before you start applying your cleaning agent, it is important to remove any excess debris. This can be done by using a leaf blower or broom to sweep the shingles clean. Get rid of leaves, branches, and any other debris that may be on the shingles. Not only will this make your cleaning efforts more effective, but it will also help prevent any dangerous situations, such as tripping over branches.
HELPFUL TIP: When using a leaf blower is to blow from the ridge towards the edge of the roof. This technique prevents branches and other debris from getting lodged beneath the edges of the shingles.
Step 5: Mix Your Cleaning Solution
One of the easiest and most effective methods for removing algae, moss, and stains from your shingle roof is to use a bleach solution. By mixing bleach with water in a 50:50 ratio and applying it to the roof’s surface, you can effectively eliminate these unwelcome growths.
Many people also like to add a 1/4 cup of dish soap to their cleaning mix. This allows the cleaner to stay wet longer, giving it more time to effectively work and it helps slow the cleaner from running down the roof.
Step 6: Apply The Solution
When it comes to cleaning your roof, it’s important to start at the highest point and work your way down. This ensures that the cleaning solution is evenly applied and has maximum contact with the surface.
To do this, you can use a garden sprayer to spray the cleaning solution onto your roof’s surface. The solution should be left on for approximately 15 to 20 minutes, allowing it enough time to penetrate and break down any organic matter that may be present.
Step 7: Rinse Your Roof
Once the allotted time has passed, it is crucial to thoroughly rinse the shingles with plain water to ensure that any traces of the cleaning solution are completely removed. This step is essential to prevent any potential damage or discoloration caused by residual chemicals.
By rinsing the shingles with water, you can effectively remove any remaining cleaning solution and restore the natural appearance of the shingles. It is recommended to use a garden hose or pressure washer on a very gentle setting to ensure even coverage and thorough rinsing.
Keeping Your Roof Shingles Clean
To prevent algae and moss growth on your shingle roof, there are several measures you can take. Firstly, it’s important to trim overhanging trees or branches that create excess shade on the roof. This shade promotes moisture retention, which is ideal for algae and moss to thrive. Additionally, consider installing zinc or copper strips along the ridge of your roof.
When replacing your roof, be sure to ask your local roofing company if they offer algae-resistant shingles. These shingles are specifically designed with copper granules in the mixture to inhibit the growth of algae and moss.
Lastly, scheduling regular roof inspections will help detect any issues before they lead to leaks or further damage.
By following these preventive measures, you can maintain a clean and healthy shingle roof.

